Showing posts with label Crafts. Show all posts

Friday, 30 August 2013

Summer fun

So I decided this summer we'd do some creative activities. We actually only ended up doing 2, but they lasted a couple of days each and we had a family holiday to fit in as well. First, Ethan and I made a Harry Potter wand for him (same as here), as he's been asking for one for a while now. Due to the amount of glitter glue he decided to use, it took over the night to dry so it rolled into two days.
We didn't get a picture (and I've no idea where it's gone now!) but the thing was so sparkly it looked like it might actually be glowing. He loved it, of course!

Next we have Babies Breaking Bad!


Kidding! We did tie dye. They thought that rubber gloves were the best things in the world, thank you 49p for 2 pairs at Sainsbury's, and managed to stay clean. We did tub dyeing rather than in the machine so they could actually do stuff, and we did it outside. 
 Rinsing with the hose was a hit, though they love the hose in any form.

 If you can't tell, these are their excited faces.
We also did red ones, though they came out sort of pink. I'd definitely recommend it, they thought it was fun because it was a bit messy, and it was also easy peasy, mix dye with water and salt, and chuck in the rubber-banded clothes, leave for an hour, stirring occasionally. Rinsing was a bit of a pain, but no big deal really. It was also pretty cheap, basic t-shirts £3 for 3, and some cheap white baby sleepsuits. The dye was only a few pounds a packet, and we only used half of the blue.

Not bad for a messy day of productive fun!

Update: This blog has now moved to www.undomesticaited.wordpress.com - Hope to see you over there!

Thursday, 1 November 2012

Ethan, God of Thunder and Sam, God of Mischief!

Ta-da! I'm really please with how these turned out. I think I probably could have done better if I'd not left it so late to do, I was working on them right up until the morning of Halloween.


On to the making! Ethan's costume was quite a bit simpler than Sam's, because I already had the suit from Asda, leaving only the helmet and mjolnir (the hammer to you and me), which were very easy. The helmet started the same as Sam's, paper mache and a balloon.
 Then I used this photo (found via good old google, I think it's from the movie release posters) for reference to cut out the wings from craft foam - amazing stuff - and used my glue gun to add detail like so:
 Not too shabby! A tad wobbly, but alright for a kids costume. Then I glued wire to the back to help shape them. I could have used heat, if you heat fab foam a little you can re-form it and it'll stay in the new shape. I forgot that until after the hot glue though. You can see the wire in the next picture.
 
 You can also see Mjolinr, which was really simple. I had the cardboard tube and a small cardboard box. Hole in the box, stick in the tube. Bang, done. I also put a layer of foam on the box because it was a little bashed. Then I sprayed, which was fun til I got some on the patio slabs and could smell it all day long.

A little more glue, and the helmet was done, really really easy. The handle of the hammer I just added some dark brown foam strips for the straps and handle. Ethan later asked me to take it off as he didn't like the feel, but he kept it on for photos!
I also sewed a new cape for him as the one that came with the costume was pretty rubbish and thin, and had been hemmed so the shiny side was down. Simple enough job, buy a rectangle of shiny red fabric, hem the edges, sew on a bit of velcro at the top to attach. The suit already had velcro for the original cape so I didn't even have to bother with that.

On to Sam. His costume wasn't so much harder, but it had more details. This post shows how far I'd got with the helmet and jacket.

 Here's the jacket after a coat of gold spray paint (which I now hate) for the armour. I didn't end up putting more armour on the arms for 2 reasons - first, I ran out of time, and second, Sam had enough issues with the front piece! I used fabric glue from B&Q to glue it on, but I wasn't happy it was held on enough so added some superglue, and later used the glue gun a bit to patch it up. I had some leftover green satin fabric from making bow ties, so I cut that to size, hemmed it, put velcro on it and the jacket, and voila, another cape.

Helmet. It actually turned out easier than I thought, once I decided to make it this way. I used long thin triangles of foam for the horns to make them slightly pyramid-y as that's what they look like in most of the pictures I found, and glue gunned them in place. I looked at lots of other homemade ones, but didn't use their horn instructions as they just didn't look right. They are the place I discovered craft foam though which is absolutely brilliant.
 Then came the painting. Oh my goodness, how much do I hate the gold spray paint I used. I'm sure it was just a faulty can or other brands are better but grrrrr. The first can I used did the pieces on the jacket fine, and part of the helmet before it ran out (it was a small can). So I went and picked up another one. I don't know what I did wrong but somehow that one separated! I got some gold bits but a lot of silver bits. Either way, it looked a mess. The shop I'd gone to for the paint was in Leeds and this was the day before Halloween and I didn't have time (or the inclination!) to spend another £5 plus petrol going to get more. I looked through some shops here, no joy for spray, but in B&Q (again, awesome) I found some gold emulsion. Now, I don't know who the heck would paint their walls metallic gold, but I grabbed a tester pot and went with it. It was ok. It was drippy and took an absolute AGE to dry, but it covered the patchy awfulness.
 Ta-da again! Here also is Sam's staff of Loki, and of this I am quite proud. I tried to find pictures online but it's a pain, as he has 2 or 3 different ones in the film. I eventually found This brilliant blog post where a guy has finished his own (MUCH more professional!) staff. It gave me a great point of reference for shapes and general ideas.

I started off with a long cardboard tube again, it had previously been a sword for a knight costume for Ethan. Sam had a blue glitter and water filled bouncy ball which I thought would do well for the stone. I wanted to stick a torch inside the tube to light it up, but couldn't find one thin enough. Then I noticed on that blog that there was a sort of metal junction-y bit under the stone, and I had a torch small and thin enough for that. So...
There it is! the blade-like parts are all sprayed foam, the 2 sections under the ball are the torch. All glue gunned into place. It wasn't the neatest glue job, but again, time. I made a small cut away it the top of the tube so I could turn the torch on and off as the switch was annoyingly on the bottom end, then covered it with a flap of foam.
All in all, I'm pretty pleased with the results. I thought I might have bitten off more than I could chew with this, but it was all surprisingly simple once I'd got all the plans in my head. Sam didn't want to wear his helmet much, and it rained on us while 'trickle treating' as Ethan calls it, but we had a pretty good time anyway, and they got plenty of treats!

Update: This blog has now moved to www.undomesticaited.wordpress.com - Hope to see you over there!

Sunday, 21 October 2012

Sam's Loki Costume - in process.

So Halloween is approaching, less than two weeks to go. Eek! need to get a wriggle on with the costumes!

Luckily, they are proving to (so far) follow the simple ideas in my head. As they're just for the kids I've simplified a bit. In fact with Ethan I've completely cheated, the base of his Thor costume is shop bought, as I was having issues with finding tops in the right pattern and it was only £12.50. I'm planning on modifying it as it's not as detailed as I'd like. Anyway, onto progress pics!
 
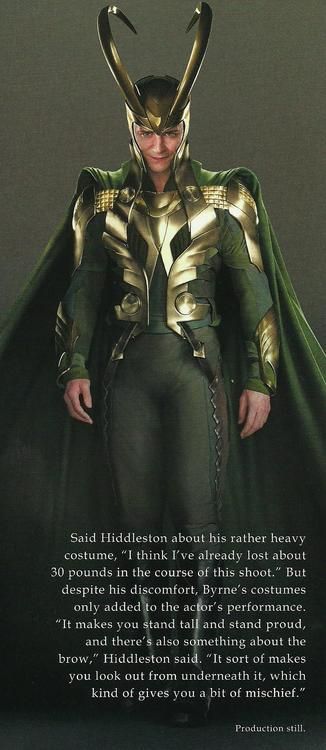
I found this picture via Pinterest for a good front on view of Loki's armour and helmet. I decided to simplify it not only for ease, but also because when you're making it for a 2 year old, the pieces get slightly weeny, and sort of pointless.

So here is Sam's jacket so far -
 I intend to add the shoulder and forearm guard bits. The yellow is just craft foam, lightweight and bendy, practically indestructible even for my Sam. Each side piece is 2 pieces of foam, the curved main bits and the thinner top piece. to make the sort of wing-ish design I just cut into the foam but not right to the other side, so it's still all joined on the curved edge, and slightly overlapped them. I tried glueing them in place with PVA as I was told that'd work on craft foam. Not so if there is any sort of pull or resistance. Superglue however was brilliant, even if I did lose a couple of fingerprints in the process. The circles I just stuck on, again, superglue. The jacket was a simple black zip through sweater from Asda, £3 I think. Though they don't tend to sell black clothes for 2 year olds, so I bought it in age 3-4 and took it in, super easy, especially if you're not too fussy about the finished sleeves.There were literally no small boys clothes in a dark enough green, so black had to do. The foam isn't glued on yet, I'm going to spray it gold first. I'm not sure about how to attach the necklace type bit, probably glue on one side and velcro on the other so I can still get to the zip to put him in it.

And now, the helmet -
Paper mache. I've done 3 basic helmet shapes and it took the best part of 2 days, with layers and drying glue and what not. Why have I done 3 you ask? well. One for Sam, one for Ethan. The third was the first attempt of Sam's, but I made it too small, and it scratched his face putting it on. Whoops :S For the right size I measured their heads at the largest point, then added a couple of inches (I forgot to add the inches in the first attempt) then inflate a balloon, with the balloons widest point measuring the same. With Sam's second attempt it was actually a little bit too big, and he looked like a bobble head! Sigh. So this time I just cut a slit all the way up the back and overlapped the sides until it looked ok.

A tip to cut down on the time you spend paper mache-ing - draw the shape of the helmet on the balloon, and just make sure you overlap the lines a small amount. You can't see in the picture, but the back stops about halfway down the balloon. It leaves a bigger gap to get the thing on his head, and also stops it being too tall for his head too. This means that if you cover the whole balloon you're then cutting off an awful lot of waste, which you've just spent yonks glueing onto the balloon and waiting for it to dry. Can you tell I also did this on the first one?

The horns are plant wire I found in B&Q for a couple of pounds. I'll be adding craft foam to them to make them much fatter and more 3d. Then I'm going to try adding a few craft foam details to the helmet before spraying it gold. I've already sewn a rectangle of green satiny material for his cape, and he'll just wear dark trousers and wellies.

For a costume process post, this is a bit wordy! Will update with more progress when it happens!

P.S. Spellcheck says 'gluing' is the correct spelling. It just looks wrong though, so I've left the e in. Sorry if it makes you twitch ;)

Update: This blog has now moved to www.undomesticaited.wordpress.com - Hope to see you over there!

Monday, 1 October 2012

Robots and Spaceships and Aliens oh my!


It's been a while! So, what have I been up to. I made another baby quilt, this one for my lovely friend Harriet's teeny weeny new boy, the very gorgeous William.
Isn't he scrummy? Also how gorgeous is this picture. You can completely see the total adoration, and it still doesn't quite capture it. That house is bursting with love.

Here's the blanket - I'm very pleased with this one, the fabric was such a good find, boys are difficult to shop for!
 The two materials came as a set too, perfect for a matching front and back piece. There was also a third pattern, like the front with the squares, but the pattern was much larger and so would have been great for a big blanket, but not a baby one. I'm very fussy about fabric. Even though the blankets are (so far) all for babies, I don't like picking a fabric that's too babyish, as my way, the babies don't out grow the patterns too quickly! My boys each have one, Ethan's was made by his auntie Sheri, and has dinosaur patterns, and Sam's was made by my mum and has animals and palm trees and stuff.

Last weekend we took Ethan for a treat day - I read an article recently about how sometimes we can get so caught up on telling off our kids, that they don't hear as many I love yous, and recommended treat days where the child gets to make the decisions and you get to just have a good time with them. I'm making it sound hippyish, but that's basically the gist, and really, it's about quality time together, with the focus on one child (the article recommended taking the child out without siblings if possible). It's supposed to also help 'reset' the child's behaviour and your responses to it, sort of a clean slate.

 So Ethan chose Sundown Adventureland, a children's theme park about an hour away. We've been before with school so he was very excited to go, and asked if Daddy and Sam could come too, and off we went.

 First came the Santa ride. It's open all year round and Rich was very excited, as he is a massive Christmas lover. The boys were excited too, and we went on it twice. There are actually two Santa rides there, but the second one only opens at the beginning of November. The boys were not impressed.
 Santa's sleigh crossing the moon! The whole park is (dated) animatronics, so it all moves.
 Santa's map. I'm not sure he's getting the best time with this route.
 
 On the tractor ride, and apparently not impressed with my photography skills.
 Getting onto the Robin Hood ride. There aren't any pictures of the ride in progress as I was too gobsmacked by the animatronics. At one point you're practically flashed by Maid Marion!
Attempting to release King Arthur's sword. There were lots of other rides and play areas, but I'm terrible in that I always forget to take pictures and end up with random insights to the day :)

So here's the skinny - I'd definitely recommend it, it was perfect for the kids, the rides were not in the slightest scary or fast, and it's not too expensive. £11 for adults and kids, and under 2's are free. There are 2 indoor play areas with food available, again, fairly cheap, and really good. Best of all, once you're in, the only things you pay for are food (although you can bring your own) and the gift shop, assuming you want to stop there. That too is reasonable.

All in all it was a brilliant day, we had loads of fun, there was no tellings off from us, and his behaviour was brilliant, with no whining, which recently had become pretty epic. A win I think!

Next time - an update Sam's Loki jacket for Halloween, it's going well so far!


Update: This blog has now moved to www.undomesticaited.wordpress.com - Hope to see you over there!


Thursday, 16 August 2012

The things you see when you're out without a gun!

This is one of my Granny's sayings. Usually it referred to someone who was dressed eccentrically or revealingly, or behaving ridiculously or inappropriately. We saw a few instances where she'd have said it today!

Amy, Mum and I were in town and first saw a girl probably about 18 with her (presumed) boyfriend and mum. She was wearing patterned tights that looked kind of lacy, and double denim-ing it up like a pro. Only, from the back you couldn't tell there were 2 kinds of denim, as her denim shirt was butt-skimmingly low enough to completely obscure her denim hot pants. I say hot pants, more like the most uncomfortable knickers in the world, they were that small!

Now, we actually didn't talk about the girl much, we were busy chatting about the dynamic between her and her mum. Mum was absolutely agog that anyone would allow their daughter to wear such (a lack of) clothes, and suggested that had we tried to leave the house like that she'd have had a fit. At this point Amy and I burst out laughing at the absurdity of the idea of leaving the house alive dressed like that, and Amy said we'd never have tried, at which point I said in an imitation of mum, "Oh, you want to wear that? fine, you can be buried in it!"

I tried to get a stealthy picture a la daddy cool in Asda as the shorts were absurdly tiny, but my phone camera wouldn't load fast enough and they were gone. Plus, mum said she wouldn't want to put a picture up anyway, as it was too much!

We had a lovely time shopping in Created in Yorkshire, a fab craft shop in The Ridings in Wakefield. It's a small co-operative that we were tipped off to as a friend is selling her wares there! Everything was gorgeous, and I bought this stained glass angel Christmas tree decoration. Yes, in August. We love Christmas in our house!
It was all so lovely though, I wanted to buy ALL the things, including a gorgeous canvas with embroidered poppies in black, with red felted petals, it was beautiful, I was very tempted to ask for the price. I've got a feeling I'll be back there again.

Then we came across crazy incident number 2. As we were getting in the lift to leave, a very elderly lady in a wheel chair was being pushed out, by a FIVE YEAR OLD girl. She was on the wrong floor so we tried to steer her right, but it turned out she was in the wrong lift too. It turned out that her son (the little girl's dad) had refused to go in the lift (a fear) and the little girl needed the toilet. He got the Grandma to take her, only she was in a wheelchair that couldn't be self propelled as it had little wheels, and she looked as if she couldn't have pushed herself anyway. So the 5 year old - who seemed younger even than that - was pushing her, and had gotten in the wrong lift. We managed to figure out where they needed to go, though only because she knew she'd parked in shop mobility, and only one car park has it. In the end we took them right to their car, as we couldn't find the son who'd apparently waited by the lift. It's scary to think what could have happened, as they were both clearly quite vulnerable. Let's just say we weren't exactly thinking too kind thoughts about the Dad/Son guy in that situation!

After we finished our tour of the lifts and car parks, we went to Lidl so Hayley could spend her birthday money on Dolls house sets, and I picked up some bargain birthday presents for a couple of Ethan's friends. However the best part was spotting this on the sign outside - apologies for the terrible reflective picture:

The Ultimate Zombie Apocalypse Weapon! Cut down the undead while maintaining a safe distance from the splatter of unwanted zombie juice! 3 year Guarantee, if you live that long! Also chops down trees for fortifying your home/bunker. Buy now and be prepared!

We also had plans to visit the Hepworth Gallery, but it was shamefully cast aside to fit in shopping for the adults, shopping for the kids, and an eyebrow threading for Amy. Another time perhaps. 

Update: This blog has now moved to www.undomesticaited.wordpress.com - Hope to see you over there!

Sunday, 12 August 2012

Roundup

 So in the last little while we've had:
  Sam waving back at Sir Chris Hoy on his lap of honour after winning gold.

 My sister Amy and I making pool noodle horses for the jousting at Hayley's (my niece) birthday party.

 "I call it Nude Descending a Staircase" Sam thinking he is Calvin of Calvin and Hobbes
 Ethan and Sam meeting Peppa Pig in Asda. Sam was completely amazed, Ethan was amazed and slightly scared!
 My boys cuddling :) of course 30 seconds from this they were wrestling like you wouldn't believe, but there we are.
 Sam and his amazing climbing abilities. I keep having to find new 'out of reach' spots! Here he's waving about a homemade wand (yes another one!) that I thought I'd tucked away on a blocked off windowsill. He climbed up a chair, then a table to get to it. This one was destined to be a surprise for another child, until I found out they already had one!

So once again I had a sad lonely wand sitting about my house! I was just waiting to see if anyone wanted it when today we went to Rich's parents for dinner and to celebrate Mel's birthday (sister in law). She'd asked for no present (what?!) so we'd just given her some money - you can't have nothing! Only then she mentioned that she'd seen the other wand on facebook and really liked it. So I snuck out and went home, did a quick age wash to finish it (luckily it dries almost instantly) and hastily wrapped it in brown paper and a ribbon. 

She actually squealed when she opened it, I love that part!

Update: This blog has now moved to www.undomesticaited.wordpress.com - Hope to see you over there!

Monday, 6 August 2012

Ollivander Update!

The magical post made it through the muggle system, Hooray! Seriously, sometimes I think it'd be more reliable to invest in (and then train of course) an owl.

Robyn was, I'm told, absolutely thrilled :) I love it, I got to make kids happy with just normal (ok, slightly on the geek side, but that just makes it better!) childhood things!

To be honest, the pictures speak for themselves without my waffling, so here goes...


 Look at that grin!
 Finding the wax seal
Is that not the happiest excited face you've ever seen?

After doing Robyn's wand and letter, I saw on facebook that another friend, Rachel, was doing a Harry Potter week in the summer holidays with her kids and they were making wands, so I offered to send them Ollivander letters too, congratulating them on their wandmaking.

 This is Izzy, who also happens to be friends with Robyn, so in her letter I mentioned that she shouldn't tell muggles, but that I'd already written to Robyn so it was ok to tell her ;)
And this is Alex (7), who apparently, along with his little brother Sam (5) was completely taken in by it all, love it! Rachel told me that Sam also quietly asked her if the wands would work when they were finished, bless him!

While pilfering (with permission!) these pictures from facebook, I've also seen that Robyn has instructed her mum to buy a frame for her letter! Makes me feel like I really did a great job!

Thanks to Rach and Mel for letting me share pictures of your gorgeous children x

Update: This blog has now moved to www.undomesticaited.wordpress.com - Hope to see you over there!

Monday, 30 July 2012

Being Garrick Ollivander

So, I have a bit of a thing about making stuff - I love to fiddle, make, draw, paint, sew, pretty much anything that keeps my hands busy. Not long ago I found Instructables and I love it! So many projects!

One of the first ones I spotted that I wanted to make was the Harry Potter wand tutorial. I am a Potter Geek, I had just finished the whole set again (I've lost count how many times, I just love them!), and I loved the idea that I could make it in under an hour, and with stuff I already had around the house - Those kinds of crafts are great, impromptu quickies. So, I got cracking a couple of weeks ago and...

Ta-da! The tutorial is really easy, and I think an older child would be more than able to manage it, Though it does use hot glue, so they'd probably need help with that. Basically it's a long thin cone of paper filled with the hot glue. The filling part was tricky trying to work the glue right down into the cone as it does cool quite fast - I held the outside of the wand against a hot iron to remelt some of the glue and forced it down with a spare glue stick from the packet, and still had a small air pocket in the middle!

The tutorial was for a generic wand, but I'm a bit of a perfectionist, so I went online to find pictures of the wands from the movies. I wanted to make Neville's as I love the character, but it looked quite tricky, so I chose to try Hermione's first:
Which was really really easy. The pattern around it is just glue gun glue squirted round it And then I painted the whole thing with acrylic paint, and did a dark wash (watered down paint painted on then rubbed off so the crevices look darker) to age/distress it a bit, and basically stop it being one flat colour. It's slightly greeny brown, because that's what the pictures looked like!

Now here comes the fun part. A friend, Mel, tweeted that her daughter Robyn is Harry Potter obsessed, and was spending the day being Hermione (her favourite character) having plaited her wet hair the night before to make it curly. It made me smile as it was totally something I would have done on a whim as a child (Had HP been around then!) and I kept remembering it for a day or two. Then I remembered my Hermione wand sat on the top of the kitchen cupboard, not quite finished, looking a bit abandoned. So I offered it to Mel, and offered to do a letter from Mr Ollivander to go with it. Cue craft number 2, wizard's stationery in the Oven! All I did was print up a letter unique to Robyn, including how the wand she had was broken by her sister, and the properties that her wand has - Mel checked what wand had chosen Robyn on Pottermore and I matched it as well as I could (I had to change the length slightly as the wand was already finished and a bit long). Then I soaked the paper in very strong coffee. We don't drink coffee so it was good to get my moneys worth out of the sad little jar that I'd bought to have in the cupboard in case of builders and parents of the children's friends, but had never been opened!

I actually tried 3 different letters (again, perfectionist). The first I soaked and tore the edges slightly to age it, then tried to dry it on a baking tray. The raw edges baked to the foil and it ripped coming off. Rubbish. I tried a second torn edged one and dried it on the oven shelf like this:

 But it just didn't look right, and I tried again with the straight edged version you can see up there. The problem with putting it straight on the shelves is that the water evaporates unevenly, giving you stripes from the rack, which I really did not like at all. Gah! I actually re-soaked that one - I'd run out of copies as we've got no printer at the moment - and dried it on an upside down baking tray, and huzzah! It worked! But I still wasn't done, as it dried quite warped and wrinkled, and very brittle. I was actually too scared fold it into the (also coffee stained) envelope! I tried steam ironing it, so it was flatter and not quite so totally dried out to a crisp. It worked really well and left the paper just feeling like stiff paper (or parchment, which was what I was going for) rather than crunchy dried out leaves.
 Then I decided I wanted to put a wax seal on it. Much harder than I thought. It's incredibly easy to do, if you have a stamp for the seal, or something you can improvise to a stamp. I did not, but I couldn't not do it after I'd decided I wanted to! I spent maybe an hour melting wax and shoving stuff in it to try and find something like the design I had in my head, and had to keep simplifying it or changing it, but I'm happy with how it worked out. If I do it again I think I'll go rubber stamp shopping first to see if I can find anything I like, because I made this with 3 different implements (read household objects) and was a right faff. In the end I wanted it to look at least vaguely like a wand casting a round spell, as the circle would therefore also be an O. I think it turned out ok, I did the same seal on the back of the envelope as well.
 So, there you have it! I wrapped the wand in a piece of purple velvety fabric and made a cardboard box (not nearly pretty enough for a picture) to protect it in the post, then put both the box and the letter in a jiffy bag, which I made 2 more 'parchment' labels for, adding a HP twist to the address with the location of Robyn's bedroom, and a scrawl on the back saying "Owl injured in transit, use Muggle post" and now all there is to be done is take it to the post office.

I'm really excited to hear and hopefully see in pictures how Robyn reacts when it gets there, I really enjoyed doing it so hopefully she'll love it!

Things I have learnt:
Don't use your ironing board as a surface. I practised making the wax seal on it as our table space is limited, and I slipped and smeared crayon wax on it. I needed a new ironing board cover already so I'm not too cross, but now I really need a new one.

Don't use crayons for wax seals. They melt to a very thin liquid which doesn't led itself to stamping, as it cools hard quite slowly. Candle wax is better. Sealing wax is obviously best, but you'd have to buy it, as it isn't the kind of thing that is just lying about the house. And I'm cheap ;)

My next planned project:
Thor helmet for Ethan and Loki costume for Sam. It's for Halloween so likely won't be finished for a while and probably not started for a bit either!


Update: This blog has now moved to www.undomesticaited.wordpress.com - Hope to see you over there!